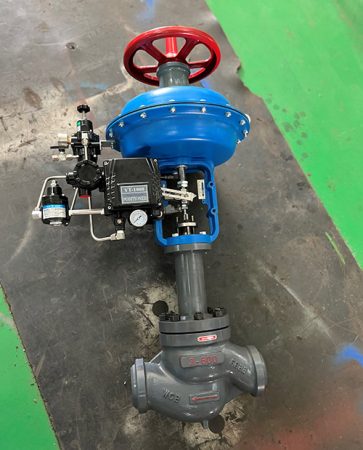
When you pick a pneumatic control valve, you make choices that change your whole system. The right valve helps you control things well, keeps people safe, and works strong.
- Good pneumatic control valves help things run better and keep your process steady.
- Strong valves save money because you do not need to replace them often or stop work.
- Picking the right valve keeps people and machines safe and helps follow rules.
To pick the best valve, you need to know what your job needs, the right size, and if the materials work together. A pneumatic valve is simpler and easier to fix than an electric ball valve. The best valve helps your new or better system work its best.
Key Takeaways
- First, know what your process needs. Think about the fluid type, flow rate, pressure, and temperature. This helps you pick the right valve.
- Pick valve materials that work with your media and environment. This stops damage and helps the valve last longer.
- Make sure to size your valve using flow rates and Cv math. This keeps things safe and working well.
- Choose the valve type and actuator that match your control needs. Think about speed, precision, and power.
- Use accessories like positioners and solenoid valves. These help make control more accurate and safe.
- Keep the air supply clean and dry. Watch the air pressure. This helps valves work well and stops failures.
- Think about space for installation, the environment, and safety rules. This helps the valve work well and stay safe.
- Ask experts for help with hard or special jobs. This stops mistakes and makes sure you follow the rules.
Key Factors for Pneumatic Control Valve Selection
Understanding Application Needs
You should begin by thinking about what your job needs. Every job is different, so you must know what you want the valve to do. Do you need to stop flow, control pressure, or stop backflow? Each job needs a different valve and actuator. Before picking a pneumatic control valve, look at how it will be used. Check the temperature, pressure, and what kind of fluid moves in the system. Some fluids can damage the valve or change temperature fast. These things help you pick the right materials for your valves. If you skip these steps, your valve may break early or not work well.
You also need to see how the valve fits in your control system. Make sure the pneumatic valves work with your control signals. Check if you need fast action or special features like manual overrides. Always pick a valve size that matches your flow needs. If the valve is too big or too small, it can cause problems and waste energy.
Tip: Write down what your process needs before you choose a valve. This helps you avoid mistakes and makes sure you get the features you want.
Here is a table that shows the most important things to think about when picking a pneumatic control valve:
| Critical Factor | Explanation |
|---|---|
| Process Analysis and Sizing | Study flow, calculate Cv, and check pipes to avoid sizing mistakes. |
| Material Compatibility | Pick materials that do not rust and can handle heat changes. |
| Dynamic Process Response | Match valve speed and control range for steady work. |
| Environmental and Installation | Check space, shaking, and outside conditions for good use. |
| Safety and Emergency Response | Make sure the design is safe and has features for emergencies. |
| Supplier Evaluation | Choose suppliers with good support, certificates, and quality checks. |
| Customization and Engineering | Find ways to adjust valves for your special job. |
Why Proper Selection Matters
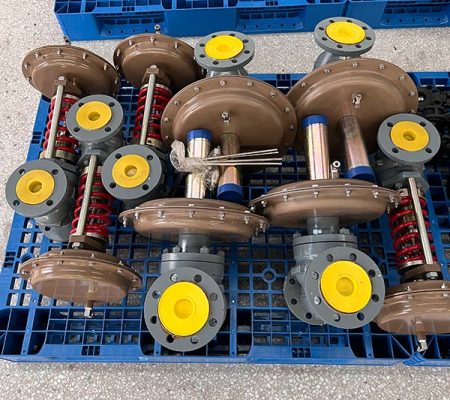
Picking the right valve helps your system work better and keeps it safe. Good pneumatic valves keep your process steady and save energy. If you pick the wrong valve, you can have big problems. You might get leaks, pressure jumps, or even system stops. These problems cost more money, cause delays, and can be unsafe.
The wrong valve can also make noise, shake, or break pipes. These issues mean you spend more on fixing or replacing parts. Leaks can also hurt the environment. The right pneumatic control valve helps you avoid these problems and keeps things running well.
You should always think about these things when picking a valve:
- What the process fluid is and if it works with the valve
- What you need the valve to do
- The right size and how it works
- If the material is good for the place it will be used
- How easy it is to fix and how long it lasts
- If it meets industry rules
If you focus on these main things, your pneumatic valves will give you the performance, safety, and reliability you need.
Identifying Process and System Requirements
To pick the right pneumatic control valve, you must first look closely at your system. You need to know what kind of media, flow, pressure, and temperature are in your process. These things decide how well pneumatic valves work and how long they last. If you skip any part, you might have bad control, early valve failure, or safety risks.
Media and Fluid Characteristics
Types of Media
You should know what goes through your pneumatic valves. The media could be air, water, oil, steam, chemicals, or thick fluids. Each one has its own problems. For example, thick fluids like oil or syrup make more friction inside the valve. This makes it harder for the actuator to move and can wear out the valve faster. Some fluids have solids that can block small spaces. Others, like steam or chemicals, can hurt the valve materials.
- Thick fluids make more friction and pressure drop, so the valve may not seal well.
- Thick fluids can block openings and cause the valve to wear out or rust faster.
- Using a valve with thick fluids all the time can wear it out and cause damage.
- Pressure drops in thick fluids can cause flashing, which can break valve parts.
- The valve’s design and material must fit the fluid to keep it working well.
Tip: Always check if your media can hurt the valve or make it wear out faster. This helps you avoid spending money on repairs.
Impact on Valve Materials
The media in your system tells you what materials you need for your pneumatic valves. If you use acids, alkalis, or cleaning chemicals, you need materials that do not rust. For steam or hot fluids, you need metals that stay strong at high heat. Some valves use stainless steel, special alloys, or strong plastics. These materials keep their shape and strength even when the temperature changes fast or the chemicals are harsh.
If you do not match the material to the media, your valve can crack, leak, or break early. Always pick the right valve material for your fluid and temperature.
Flow Rate and Valve Sizing
Calculating Maximum and Minimum Flow
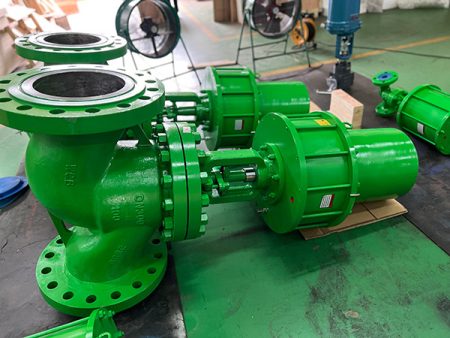
You need to know the highest and lowest flow rates in your system. This helps you pick a pneumatic flow control valve that works all the time. If you only size the valve for normal flow, it may not work during startup or shutdown. These times can bring fast changes that hurt the valve.
- Use flow charts or software to find the right valve size.
- Make the valve about 25% bigger to handle losses and future needs.
- If your process might grow, pick a modular valve with parts you can change.
CV Value Calculation
The Cv value shows how much flow a valve can let through with a set pressure drop. You must figure out Cv to size your pneumatic control valve right. For liquids, use this formula:
Cv = Q × sqrt(SG / ΔP)
Where:
- Q = flow rate (GPM)
- SG = specific gravity
- ΔP = pressure drop (psi)
For gases, the formula is different. You can use charts or software to help. Picking a valve with a Cv close to your needs gives you better control. If you pick a valve that is too big or too small, it may not work well, waste energy, or get damaged.
Note: Industry rules like ANSI/ISA-75.01.01 and IEC 60534-2-1 help you size valves. These rules ask for things like pipe size, pressure, temperature, and fluid type. Always follow these steps to pick a safe and good valve.
Pressure and Temperature
Inlet and Outlet Pressure
Pressure at the valve’s inlet and outlet changes how well your pneumatic valves control flow. Some valve types, like unbalanced poppet, have big changes in outlet pressure when the inlet drops. Balanced poppet valves have smaller changes, so control is steadier. For the best control, two-stage regulation uses two valves in a row. This keeps the outlet pressure steady, even if the supply pressure changes a lot.
| Aspect | Unbalanced Poppet | Balanced Poppet | Two-Stage Regulation |
|---|---|---|---|
| Outlet pressure change with inlet drop | Large increase | Small increase | Minimal change |
| Control accuracy | Low | Medium | High |
| Best use | Simple jobs | Moderate control | Sensitive applications |
You must pick the right valve type for your job. If your system has big pressure changes, use a valve that keeps the outlet steady.
Temperature Effects
Big temperature changes can stress your pneumatic control valve. High or changing temperatures can make metals or plastics weak. Some fluids also get more harmful at high heat and can attack the valve. You need materials that stay strong and keep their shape, even when the temperature changes fast or gets very high. Stainless steel, special alloys, and strong plastics are good choices.
Alert: Always check if your valve can handle the hottest and coldest temperatures in your process. This keeps your system safe from leaks, cracks, or sudden breaks.
Commonly Overlooked Requirements
Many people forget important things when picking a pneumatic control valve. Missing these can cause big problems later. Here is a table of the most missed needs and what can happen:
| Overlooked Requirement | Description & Impact |
|---|---|
| Startup/Shutdown Conditions | Not thinking about these can cause damage, especially if valves stay partly open during startup. |
| Cleaning Processes | Not checking if the valve material works with cleaning fluids can hurt the valve. |
| Emergency & Upset Conditions | Not planning for power or air loss can leave valves in unsafe spots. |
| Isolation vs Control Valve Roles | Using control valves to shut off flow can cause leaks or breaks. |
| Future Process Growth | Sizing only for now can cause trouble if your process grows. |
| Communication of System Details | Not telling suppliers all the details can lead to picking the wrong valve. |
Tip: Write down all your process details and share them with your supplier. This helps you get the best pneumatic flow control valve for your job.
By knowing your media, flow, pressure, and temperature, you can match your job’s needs. This careful way makes sure your pneumatic valves are safe, reliable, and last a long time in every use.
Choosing the Right Pneumatic Control Valve Type
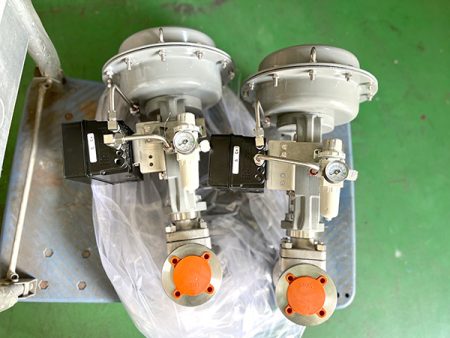
Picking the right pneumatic control valve type is very important. It helps your system work well and stay safe. You need to make sure the valve fits your job, flow needs, and how your system works. Knowing about different pneumatic valves and how they move air or fluid helps you choose better.
Common Pneumatic Valve Types
There are many types of pneumatic control valves in factories. Each one does a special job and fits certain uses.
- Globe Valves: These valves let you control flow very closely. You use them when you need to change flow a little at a time. They are good for jobs that need steady and careful flow changes.
- Ball Valves: Ball valves turn flow on or off very fast. You use them when you need to stop or start flow quickly. They are easy to use, strong, and work with many pressures and temperatures.
- Butterfly Valves: These valves are light and small. You use them when you need to move a lot of air or fluid. They are good for places with little space and low pressure.
- Specialty Valves: Some jobs need special valves like needle or throttle valves. These help you control how much air moves and which way it goes. You see them in car factories, plane parts, and assembly lines.
Tip: Always pick the valve type that matches your job. The right valve makes the actuator move faster and more exactly. It also helps your system work better.
Here is a table that shows common pneumatic control valve types and what they are used for:
| Pneumatic Control Valve Type | Typical Use Cases and Applications |
|---|---|
| 3/2 Way Directional Control Valve | Sends air to single-acting cylinders; used for turning things on or off in machines. |
| 5/2 Way Directional Control Valve | Runs double-acting cylinders; lets machines move parts in and out. |
| 5/3 Way Double Solenoid Valve | Has three spots for cylinder control; can lock or float cylinder parts. |
| Two-Way, Two-Position Valve | Simple on-off flow; used for locking, stopping, or joining parts of systems. |
| Three-Way, Two-Position Valve | Runs single-acting cylinders or other valves; lets air in or out for cylinder control. |
| Four-Way, Two-Position Valve | Moves cylinders and motors both ways; used for starting and reversing cylinders. |
| Four-Way, Three-Position Valve | Has center spots for locking or floating cylinders; used when you need middle control. |
| Pneumatic Spring Offset Valves | Uses a spring to move the valve back; common in two-way valves for a default spot. |
Flow Characteristics
When you pick a pneumatic flow control valve, think about how it changes flow as you move it. This affects how well you can control your system.
Fast Opening
Fast opening valves let a lot of flow through with just a small move. You use these when you want quick on-off action, like for drains. They are not good for careful control because they can change things too fast.
Equal Percentage
Equal percentage valves start slow and then let more flow as you open them more. This helps when pressure changes a lot in your system. You get better control at low flows and bigger changes at high flows. These valves are good for steam or when pressure drops as flow goes up. They help keep things steady and make tuning easier.
Linear
Linear valves give the same amount of flow change each time you move them. You use these when pressure stays the same, like in water pipes. Linear valves are easy to use and save energy. They are good for careful flow control.
Note: Valve positioners can help you change how the valve controls flow. You can set them to act like different patterns without changing the inside parts.
Valve Core and Trim Options
The core and trim of your pneumatic control valve change how it seals, controls flow, and handles pressure.
Single Seat
Single seat valves have one sealing part. You use them when you need a tight seal and little leaking. They work best in clean systems with not too much pressure.
Double Seat
Double seat valves have two sealing parts. They can handle more flow and need less force to open or close. You use them in bigger systems, but they may leak more than single seat valves.
Sleeve
Sleeve valves use a round sleeve to control flow. They move smoothly and do not wear out fast. You use them when the fluid is dirty or rough.
Multi-Stage
Multi-stage valves have more than one control spot inside. They lower pressure step by step, which stops noise and damage. You use these in systems with high pressure or heat.
Picking the right pneumatic valve core and trim helps your valve last longer and need less fixing.
If you know about valve types, flow patterns, and trim choices, you can pick the best one for your system. This makes sure your pneumatic control valve works safely, well, and for a long time.
Actuator and Control Mode Selection
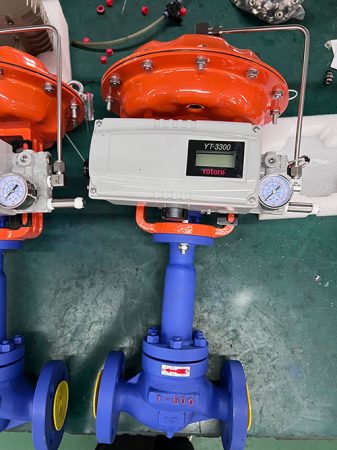
Picking the right actuator and control mode is very important. This helps your pneumatic control valve work well every time. You need to make sure the actuator fits your valve and what your job needs. The control mode you pick will decide how your system acts in normal times and in emergencies.
Actuator Types
Pneumatic actuators use air pressure to move valves. There are two main types: diaphragm and piston actuators. Each one is good for different jobs.
Diaphragm
Diaphragm actuators have a soft part that moves the valve stem. These are often single-acting with a spring that pushes back. Diaphragm actuators are best for linear valves like globe valves. They move smoothly and react fast when air pressure changes. You can use diaphragm actuators for simple on/off or for changing flow. They are light and easy to fix.
Piston
Piston actuators have a piston inside a tube to make movement. You can get single-acting or double-acting piston actuators. Piston actuators give more force and move farther than diaphragm types. They are good for bigger valves or when you need more power. You can use piston actuators for both linear and rotary valves. They work well for hard jobs, like high pressure or high heat.
Tip: Pick piston actuators if you need more power or a longer stroke than a diaphragm actuator can give.
You can also look at other actuator types, like rack and pinion or scotch yoke, for rotary valves. Always check if your actuator works with your air supply, temperature, and safety rules.
Sizing the Actuator
Getting the right size actuator keeps your valve safe and working right. You need to figure out how much force or turning power is needed to move the valve. Think about these things:
- Valve type and size
- Highest process pressure
- How far the valve must move
- Friction and packing forces
- Extra safety for emergencies
If the actuator is too small, the valve may not open or close all the way. If it is too big, it can waste energy and wear out faster. Use charts or software from the maker to pick the right actuator. Always make sure the actuator can handle how often it moves and how it is set up.
| Actuator Sizing Factor | Why It Matters |
|---|---|
| Valve size and type | Tells how much force or torque is needed |
| Process pressure | Changes how hard it is to move the valve |
| Stroke or rotation | Shows how far the actuator must move |
| Friction and packing | Adds more work for the actuator |
| Safety margin | Makes sure it works in emergencies |
Control Modes
Control modes tell how your valve acts in normal times and if air or power is lost. You must pick the right mode to keep your process safe and steady.
Normally Open
A normally open (NO) valve stays open if air or power is lost. You use this when you want flow to keep going during a problem. For example, you may want cooling water to keep moving if the system stops. Spring-loaded actuators often make this fail-open action.
Normally Closed
A normally closed (NC) valve stays closed if air or power is lost. You use this to stop flow and keep people or equipment safe in an emergency. Many safety systems need fail-closed valves to stop leaks or spills.
Note: Spring-return actuators help you get fail-safe spots, like fail open or fail closed. This makes your system safer and more reliable.
Some valves can stay in their last spot if air or power is lost, but this is not common for important jobs. Always pick the control mode that matches your safety needs.
By picking the right actuator type, sizing it well, and choosing the best control mode, you help your pneumatic control valve work well. You also make your system safer and cut down on downtime.
Material Compatibility and Durability
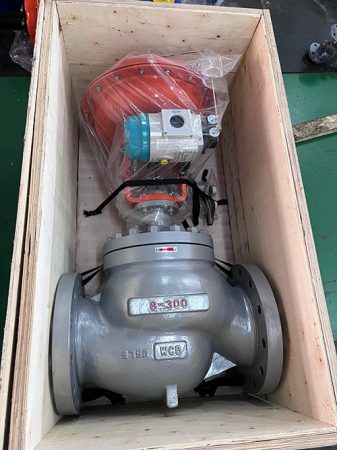
Picking the right materials for your pneumatic control valve is very important. If you use the wrong material, the media in your system can hurt or wear out the valve. You should check what chemicals, temperatures, and pressures your process has. These things decide how well your valve works and how long it lasts.
Media-Specific Material Choices
Corrosive Media (Acids, Alkalis)
If your job uses acids or alkalis, you need materials that do not rust or break down. Stainless steel (304 or 316) is good for many harsh fluids. Some plastics, like PVC, can handle some chemicals but may not work well with high heat or pressure. Always make sure the seals and seats in the valve can handle the chemicals. PTFE and special elastomers like Viton or EPDM are often good at resisting chemicals.
- Your valve will last longer if you match the material to the chemical, temperature, and pressure.
- Stainless steel, bronze, and brass are strong and do not rust, so they are good for hard jobs.
- Plastic valves like PVC do not last as long if it is hot or under a lot of pressure.
- The seal must fit the chemicals or it will break early.
- Fluids with small bits in them can wear out seals and make the valve harder to move.
- If you use the valve at its highest pressure or temperature, it will wear out faster.
- Pneumatic actuators usually last longer than the valve body, so focus on picking good valve and seal materials.
- Some valves let you change just the seals, so you do not have to buy a whole new valve. This saves money and keeps your system working well.
Steam, Water, Oil, Ethanol
Steam and hot water need metals that stay strong when it is hot. Stainless steel and bronze are good for this. For oil and ethanol, you need materials that do not swell or break. Brass and some plastics work for oils that are not harsh, but always check if they can handle the heat. Using the right materials keeps your system safe and your products good.
Concentration and Temperature Effects
Stronger chemicals and hotter fluids can break down plastics and seals faster. Always check the ratings for both the valve body and the seals. If you use the wrong material, your valve might leak or stop working early.
Valve Body and Trim Materials
There are many choices for valve body and trim materials. Each one is good for different jobs and fluids. The table below shows some common materials and how they work in tough places:
| Material | Usage in Pneumatic Valves | Suitability for Corrosive Environments | Suitability for High-Temperature Environments |
|---|---|---|---|
| Stainless Steel (304/316) | Valve bodies and trims (seats, discs, wedges) | Excellent corrosion resistance | Can withstand very high temperatures and pressures |
| Brass | Valve bodies and end pieces | Suitable for non-corrosive gases | Moderate heat resistance, less suitable for very high temperatures |
| Industrial Grade Plastics (PVC, Nylon) | Valves for corrosive chemicals and air | Suitable but limited by lower corrosion resistance | Low temperature and pressure ratings |
Tip: Always pick materials that fit your process media and conditions. This helps your products stay good and your system last longer.
When you use the right materials, your pneumatic control valves work better and last longer. You will not have to fix them as much, and your system will run well. Focus on these things to get the best value and performance.
Ensuring Optimal Performance in Pneumatic Valves
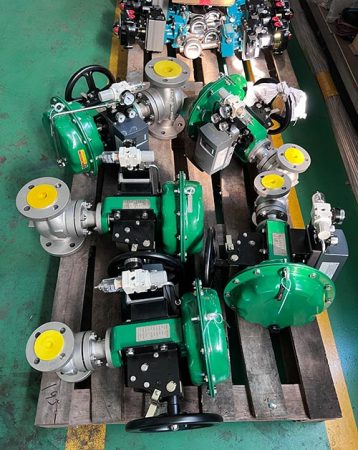
Air Quality and Supply Pressure
You must watch air quality and supply pressure to keep pneumatic valves working well. Bad air, like wet air, dust, or very dry air, can cause many problems. Wet air makes metal parts inside the valve rust. Rust flakes can break off and make the valve stick or block small holes. If the air is too dry, it takes away the oil that seals and moving parts need. When seals dry out, they can crack and stop working early. This makes the valve work worse and leak more air.
To help your valves last longer, always use air cleaning tools. Filters, water traps, and dryers take out water and dirt before air gets to the valves. Clean, filtered, and right-pressure air helps valves last longer and move smoothly. If you do not clean the air, your valves will break more and cost more to fix.
Air pressure is also important. If the air pressure or flow is too low, valves move slow or may not work at all. If exhaust ports get blocked, the valve can stop moving and even fail. You should check your air system often. Look for leaks, blockages, or dirty filters. Doing regular checks and watching pressure and flow helps you find problems early and keep things running.
Tip: Watch important numbers like air pressure and flow rate. This helps you plan repairs and stop surprise shutdowns.
Dynamic Response and Control Precision
You want your pneumatic valves to move fast and control flow well. The actuator type you pick changes how quick the valve moves. Piston actuators need more air pressure and have more friction, so they can be slower. Diaphragm actuators usually move faster and have less friction.
The positioner on the valve is also important. A good positioner helps the valve move to the right spot quickly and saves air. If the positioner has high gain, it can make the valve move faster, but too much gain can make the system jumpy. You need to match the actuator and positioner for the best results.
Friction in seals and moving parts can make dead spots where the valve does not move right away. Old O-rings or guides make this worse. Pick valves with low deadband and fast response, especially for jobs that need quick changes. Always check how the valve is built to make sure it fits your control needs.
Note: Making the actuator smaller can make the valve move faster, but it may also make it easier to move the valve by accident. You need to balance speed and control for the best results.
Noise, Cavitation, and Flashing
Noise, cavitation, and flashing can hurt pneumatic valves and make them work worse. Cavitation happens when liquid pressure drops too low, making bubbles that pop and cause noise and damage. Flashing happens when bubbles do not pop but grow and wear down the valve.
You can do a few things to protect your valves and keep them working well:
- Lower the pressure drop across the valve by changing system settings or using low-pressure valves.
- Pick valve trims with steps to lower pressure in stages and control where bubbles form and pop.
- Use materials that can handle cavitation and wear, like hard metals or special coatings.
- Add tools like diffusers, silencers, or covers to make things quieter.
- Use valve sizing software to pick the right valve size, trim, and extras for your job.
- Keep the valve open between 20% and 80% to stop noise and keep control steady.
- Design flow paths and place valves so strong forces do not hit important parts.
Valve design ideas fit into three groups: resistance (using tough materials), isolation (changing flow paths), and elimination (using pressure steps). Using these together helps your valves last longer and work better. Picking the right materials and putting valves in smart spots makes them last longer, lowers noise, and keeps your process safe.
Shutoff and Throttling Capabilities
When you pick a pneumatic control valve, you should think about how well it can stop flow and how well it can adjust flow. Shutoff means the valve can stop all flow when you need it to. Throttling means the valve can change the flow to just the right amount for your job. Both of these things help keep your system safe, save energy, and make sure everything works right.
Different valves are better at shutoff or throttling. You need to pick the valve that fits your job best. The table below shows how some common pneumatic valve types compare:
| Valve Type | Shutoff Capability | Throttling Capability | Key Operational Features | Limitations Related to Shutoff/Throttling |
|---|---|---|---|---|
| Globe Valves | Excellent tight shutoff | Precise and excellent throttling due to linear stem motion | Multi-turn operation, higher pressure drop | Slower operation, higher pressure drop, more expensive |
| Angle Seat Valves | Good shutoff but less precise | Limited precision throttling, pneumatic actuation | High flow rates, suitable for viscous fluids and steam | Requires compressed air, less precise throttling |
| Diaphragm Valves | Leak-proof sealing via elastomer diaphragm | Moderate throttling, less precise than globe valves | Suitable for sanitary and corrosive applications | Limited to moderate temperature and pressure, less precise control |
| Disc Valves (Butterfly) | Quick shutoff with quarter-turn action | Suitable for throttling but disc always in flow path affects precision | Fast operation, low pressure drop | Difficult to achieve zero-leakage seal, wear in high-cycle use |
| Pinch Valves | Effective shutoff by pinching elastomer liner | Throttling range approx. 10%-95%, best at 50% flow | Simple design, good for sterile applications | Not suitable for gas, sharp particles can damage liner |
Globe valves are best if you want no leaks and very careful flow changes. They are good for jobs where you need to change flow slowly and exactly. But they move slower and cost more money. Angle seat valves can stop flow well and work with thick liquids or steam. They do not control flow as carefully as globe valves, but they are fast and handle lots of flow.
Diaphragm valves use a soft part to seal tight. You see them in clean places or where chemicals are used. They can change flow, but not as carefully as globe valves. Disc valves, also called butterfly valves, stop flow fast with a quick turn. They are good for big flows and save space. But they might not seal perfectly and can wear out if used a lot.
Pinch valves squeeze a soft tube to stop flow. They are best for clean jobs. They shut off well and can change flow over a wide range. But they do not work well with gas or sharp stuff that can cut the tube.
Tip: Always check if your job needs a valve that stops flow tight, controls flow very carefully, or both. Pick the valve that fits your needs. This helps you stop leaks, save energy, and avoid problems.
You should also think about how many times you will open or close the valve. Some valves wear out faster if you use them a lot. Others last longer with lots of use. If you match the shutoff and throttling to your job, your system will be safer and work better.
Accessories and System Integration
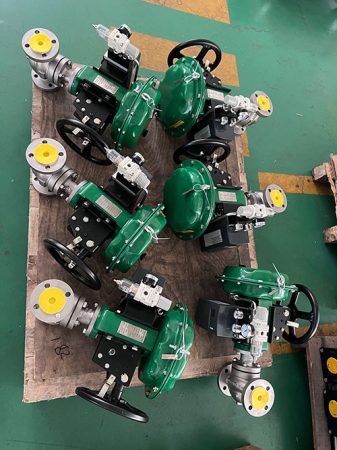
Positioners and Solenoid Valves
You can make your pneumatic control valves work better and safer by adding positioners and solenoid valves. These tools help you control your system more exactly and make it react faster. A positioner tells the actuator where to move the valve. It uses smart steps to learn and adjust, so the valve always goes to the right spot. This helps your process run smoother, makes products better, and keeps things safe. The valve also answers control signals faster, so you have less downtime.
Solenoid valves work like quick switches. They control the air that goes to the actuator and help the valve move fast when needed. In safety systems, you need a quick and sure way to close the valve. Sometimes, positioners are not fast enough or do not give the right feedback for shutdowns. Solenoid valves fix this by cutting off air right away, even if the control signal does not work.
You often see solenoid valves put between the control valve and the positioner in safety systems or interlocking setups. This way, you can move the valve to a safe spot quickly and easily. It also helps you follow strict safety rules.
Here is a table that shows how each part helps your system:
| Component | Role and Function | Benefits |
|---|---|---|
| Positioner | Tells the pneumatic actuator where to move the valve using smart steps and keeps learning. | Makes control more exact, reliable, and safe. Helps your process run better and cuts down on downtime. |
| Dual-coil solenoid valve (in positioner) | Works as a quick switch for air flow to the actuator, so the valve moves fast. | Makes sure the valve works right, uses less power, does not leak air when in place, and helps keep things safe. |
| Positioner and solenoid valve together | Makes the system simpler, saves energy, and is faster to set up. Easy to fix and swap out parts. | Helps you meet safety rules, especially in safety and interlocking systems. Makes it easier to find problems and see what is happening. |
Tip: For important safety jobs, always use solenoid valves with your positioners. This makes sure your system can act fast and safely in emergencies.
Valve Position Switches and Handwheels
Valve position switches let you know if your valve is open or closed. These switches send a signal to your control system, so you always know what the valve is doing. This is important for safety and for keeping track of your process. You can use these signals to set off alarms or start other actions in your plant.
Handwheels let you move the valve by hand. If your air stops working or you need to fix something, you can use the handwheel to open or close the valve yourself. This gives you another way to stay safe and in control. You can keep things running or shut down safely, even if the automatic system fails.
Pick position switches and handwheels that fit your valve and your job. Make sure they are simple to use and work well with your control system.
Communication Protocols (HART)
Today, many pneumatic control valves use digital tools like HART. This lets you connect your valves to your plant’s control system for better checks and control.
- HART lets you send and get digital messages over the same wires as your 4-20mA signal. You can see real-time data, change settings, and check for problems.
- You can find issues early and fix them faster, so your system keeps running and you have less downtime.
- HART works with your old wires and control systems, so you do not need to change everything.
- Device Descriptions (DD) make it easy to set up and change your valves from one place.
- You can send both analog and digital data at the same time, so you get more info about your plant.
- The protocol works with many control systems and portable tools, so you can manage your valves from different spots.
- HART lets you set up and check your valves online, which saves time when starting up or fixing things.
- Using HART makes your pneumatic valve work better, safer, and more exactly.
Note: Adding HART to your pneumatic control valves gives you better control, faster fixes, and a more reliable plant.
Control Signal Compatibility
When you pick a pneumatic control valve, you need to make sure the control signals match your system. Control signal compatibility means the valve listens and reacts to commands from your controller. If you skip this, the valve might not open or close when you want. This can lead to mistakes, safety problems, or even broken equipment.
In factories, there are different types of control signals. The most common ones are:
- Pneumatic signals (usually 3-15 psi)
- Analog electrical signals (like 4-20 mA current loops)
- Digital signals (such as on/off voltage or fieldbus protocols)
Each type has good points and some problems. Pneumatic signals are safe in dangerous places because they do not make sparks. Analog signals help you control things exactly and work well with new machines. Digital signals let you check the valve from far away and set up smart features.
You need to know what kind of signal your system uses before you pick a valve or actuator. For example, if your plant uses a 4-20 mA signal, you need a valve positioner that works with it. If your system sends digital commands, your valve must use the same protocol, like HART or Foundation Fieldbus.
Here is a table to help you compare common control signals:
| Signal Type | Typical Use Case | Key Advantages | Potential Issues |
|---|---|---|---|
| Pneumatic (3-15 psi) | Old systems, dangerous areas | Simple, safe in hazards | Slow to react, air leaks |
| 4-20 mA Analog | Modern process control | Accurate, not bothered by noise | Needs good wiring, calibration |
| Digital (Fieldbus) | Smart plants, diagnostics | Extra features, remote setup | Harder to set up, may not fit all systems |
Tip: Always look at the valve’s datasheet to see what signals it supports. If you need to connect different signals, use converters or smart positioners.
Think about power and wiring too. Some valves need more power for digital signals or to move fast. Make sure your control panel gives enough power and has the right plugs.
Signal compatibility is important for more than just the valve. It affects the whole system, including sensors, controllers, and safety parts. If you mix signals that do not match, you can get delays, mistakes, or even a system shutdown.
To avoid these problems, follow these steps:
- Find out what control signal your system uses.
- Check the valve and actuator details.
- Make sure all parts use the same “l(fā)anguage.”
- Test everything before you start running the system.
If you plan for control signal compatibility, your system will run smoothly, be easier to fix, and simple to upgrade later. This step keeps your pneumatic control valves working well and your process safe.
Environmental and Installation Considerations
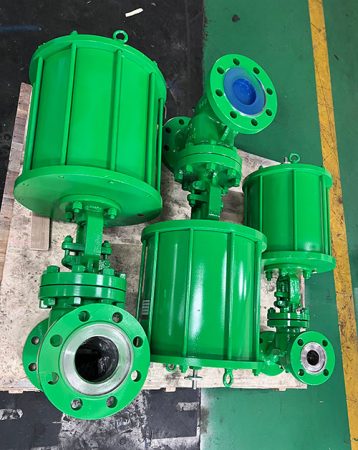
Ambient Conditions
You always need to think about the area around your pneumatic control valve. Things like temperature, humidity, dust, and height above sea level can change how your valve works. If it gets very cold, seals can get stiff and actuators might slow down. Oil inside the valve can get thick, and water in air pipes can freeze and block the valve. If it gets too hot, seals can break down, parts can get bigger, and oil can wear out faster. Both hot and cold can make your valve not last as long.
Humidity can also cause problems. Wet air makes metal parts rust faster. Water inside the system can cause rust and make thick sludge. This sludge can block air paths and make actuators work badly. If the air gets wetter or drier a lot, your valve might not work the same every day.
Dust and dirt in the air can also hurt your valve. Tiny bits can wear out moving parts and block air paths. You can help stop this by using good seals, covers, and cleaning the valve often.
Tip: Use air dryers, filters, and regulators to keep your air clean and dry. This helps your valves last longer and work better.
Space and Mounting
You should plan where to put your pneumatic control valve. If there is not much space, it is hard to put in, check, or fix the valve. If you cannot reach the valve, you might not see problems early. Always leave enough room for tools and hands around the valve.
Shaking from other machines can make bolts loose and move parts out of place. This can cause leaks or make the valve stop working. You can use strong mounts, pads, or special brackets to keep the valve steady.
Height matters too. If your plant is high up, the air is thinner. Your actuator might not get enough power from the air. You can fix this by making the air pressure higher or picking actuators made for high places.
Here is a quick checklist for mounting:
- Make sure there is enough space around the valve.
- Use strong supports and pads to stop shaking.
- Put the valve where you can reach it for checks and repairs.
- Change air supply if your plant is high up.
Exposure to Corrosive or Hazardous Environments
Some plants have harsh chemicals, fumes, or dust that can damage valves. Acid or base fumes can eat away metal and rubber parts. Some oils and solvents can break seals and soft parts. Over time, these things can cause leaks, sticking, or make the valve stop working.
You can protect your valve by picking the right materials. Stainless steel, special coatings, and plastics that resist chemicals work well in tough places. Anti-rust coatings give extra protection. For more safety, use covers or shields to keep chemicals and dust away from moving parts.
Note: Check your valves often to find rust or wear early. Change seals and oil more often in harsh places to stop sudden problems.
If you think about the air, space, how you mount the valve, and what chemicals are around, your pneumatic control valves will be safer and work better. Good planning and the right materials help your system stay strong, even in hard places.
Compliance and Standards in Valve Selection
Industry Standards (ANSI, ISA)
You have to follow industry standards when picking pneumatic control valves. These rules make sure your valves fit, work safely, and last longer. In North America, the American National Standards Institute (ANSI) makes the main rules for valves. ANSI standards cover many things:
- Connection types and sizes help your valve fit with pipes and other parts.
- Valve sizing and pressure ratings help you choose the right valve for your system.
- Markings and tag spots make it easy to find and track each valve.
- Factory tests, like hydrostatic tests, check for leaks and make sure the valve works under pressure.
- Material and casting rules help your valve stay strong in tough places.
Valves with ANSI certification also match International Society of Automation (ISA) standards. This means you can use them with other equipment that follows the same rules. You will see valves in standard pressure classes, like 150# and 300#, so it is easier to match them with your pipes.
ISA standards, like the ISA-96 series, focus on pneumatic valve actuators. These rules help you pick actuators that are safe and work well. Some important ISA standards are:
- ANSI/ISA-96.03.02-2024: Talks about pneumatic rack and pinion actuators, including torque, air supply, and mounting.
- ANSI/ISA-96.03.03-2013: Focuses on pneumatic vane type actuators, with details on torque and how they work.
- ANSI/ISA-96.03.04-2019: Sets rules for linear piston pneumatic actuators, including design and sizing.
These standards help you get valves and actuators that work together, keep your system safe, and make repairs easier.
Tip: Always check if your valves and actuators meet ANSI and ISA standards before you buy. This helps you avoid problems and keeps your plant running well.
Safety and Certification
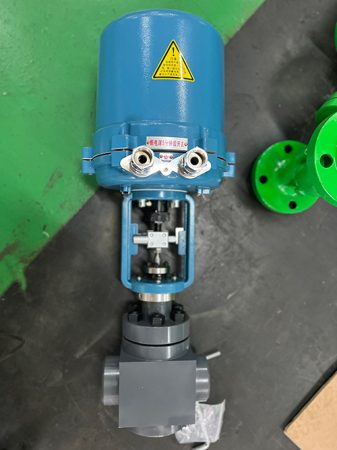
You need to think about safety certifications when using pneumatic control valves in dangerous or controlled places. Safety rules protect your workers, your equipment, and the environment. In North America, you must follow rules from groups like NFPA and API. These rules help you find risks and pick the right protection for each area.
- ATEX and IECEx certifications are the main safety marks for valves in places where explosions could happen. These show the valve will not cause sparks or explosions.
- Some countries need special marks like KC (Korea), CCC (China), and JPEx (Japan).
- North American rules, like NFPA 70 (NEC), NFPA Article 500, NFPA 496, and API RP 500, set the rules for electrical and pneumatic equipment in risky places.
- You must check your valves often and follow rules like API 598 and ISO 5208 to keep them safe and working well.
- Explosion-proof valves use special materials, pressure relief, and sealed covers to stop leaks and sparks.
ATEX-certified valves work in places with gas, vapor, or dust that could catch fire. These valves use non-sparking parts and strong seals. You will see them in oil and gas, food, chemical, and water plants. Using certified valves gives you better safety, meets legal rules, and helps your system run without trouble.
Note: Always look for the right safety marks and test reports before you install valves in dangerous areas. This keeps your people and your plant safe.
Cost and Maintenance Factors
Total Cost of Ownership
When you pick pneumatic valves, do not just look at the price. The total cost of ownership means all the money you spend from start to finish. You pay for the valve, but also for energy, air, fixing, and lost time if it breaks. Some valves use more air or power, so your bills go up. Other valves break down more and need to be replaced sooner.
- TCO means the first price, energy and air use, repairs, and what the valve is worth at the end.
- Different valves, like globe or butterfly, last different times and need different care.
- The material you choose, like stainless steel or ceramics, changes how long the valve works and how often you fix it.
- Valves that save energy, like solenoid valves that use air only when moving, help you spend less.
- If you pick the right size and pressure, you do not waste energy.
- Good valves with strong materials and smart positioners lower hidden costs and help you make more money.
- Checking and fixing valves every 6 to 12 months keeps things working and stops big repair bills.
If you use strong butterfly valves with good seals, you get fewer leaks and longer use. Following safety and sealing rules also helps you save money. Smart positioners and extra tools help you control the valve better and stop downtime, so your TCO goes down.
Maintenance and Serviceability
You can help your pneumatic valves last longer if you take care of them. Good care keeps your system safe and saves you money. Here are some easy tips:
- Change packing seals if you see leaks or if the valve is hard to move. Always check if the stem is smooth.
- Adjust actuators the way the maker says to keep the valve working right.
- Calibrate valve positioners so the valve moves to the right spot.
- Use digital positioners to stop stress and help the valve last longer.
- Pick the right valve type and size for your job so it does not wear out too soon.
- Keep valves in their safe temperature and pressure range.
- Use a checklist and look for leaks, damage, or actuator problems.
- Oil moving parts to stop friction and wear.
- Clean air pipes before you put in or fix valves so dirt does not cause trouble.
- Use sensors and software to watch how valves work and plan repairs before things break.
Tip: Plan maintenance by checking the valve’s condition, not just by the date. Fix small problems early so you do not get big breakdowns.
Installation Best Practices
Putting in your pneumatic valves the right way helps them work better. Start by cleaning all pipes and fittings before you put in the valve. This keeps dirt out of your system. Always follow the maker’s steps for putting in and hooking up the valve.
- Use the right tools and tighten parts just enough so you do not break anything.
- Put the valve where you can reach it for checks and repairs later.
- Use covers or boxes to keep the valve safe from bad weather or chemicals.
- Check all joints for leaks before you turn on the system.
- Set up actuators and positioners after you install the valve so it works right.
- Keep spare valves in a clean, dry place so they do not rust or get damaged.
If you do these things, your valves will last longer and your system will run well. Good installation and regular care help you get the best results and spend less money.
When to Consult Experts for Pneumatic Control Valve Selection
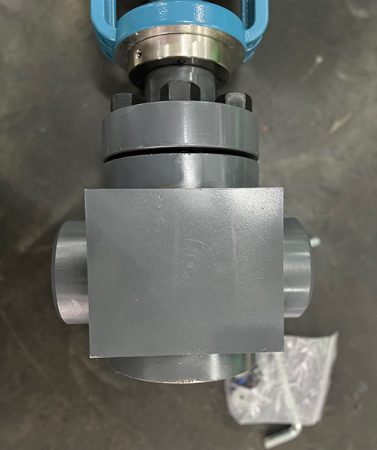
Complex Applications
Sometimes, picking a pneumatic control valve can be hard. Some jobs have lots of things to think about. You might have high pressure, very hot or cold temperatures, or flow that changes quickly. Some systems use special fluids or need extra safety steps. In these cases, it is smart to talk to an expert.
Experts help you not make expensive mistakes. They know how to solve tough problems, like:
- Systems where pressure goes up and down fast
- Jobs with dangerous or harsh chemicals
- Places where explosions or big risks can happen
- Systems with many valves and lots of automation
- Jobs that need very careful flow or pressure control
Tip: If you are not sure about your system, ask an expert early. This can save you time and money later.
Here is a checklist to help you know if you need expert help:
| Situation | Why You Need an Expert |
|---|---|
| Unusual or changing process conditions | Experts know how to size and select |
| Strict safety or compliance requirements | They help you meet all regulations |
| High-value or mission-critical equipment | They protect your investment |
| Integration with digital control systems | They ensure smooth communication |
Do not guess when your job is tricky. Experts have the skills and tools to help you pick the right valve the first time.
Custom Solutions
Sometimes, your job needs something special. You might need a valve made from a certain material, a different size, or with extra features. Custom solutions need special engineering skills. You should ask experts for help when:
- You need a valve for a new or rare fluid
- Your system has little space or tricky spots to mount the valve
- You want smart features, like checking the valve from far away
- You must follow special rules or get certain certificates
Note: Custom valves can take more time to make. Experts help you plan for these extra steps.
Experts can help you design a valve that fits your job. They help you pick the right materials, trims, and extras. They also test the valve to make sure it works in your system.
When you work with experts, you feel better about your choice. They help you avoid delays, lower risks, and keep your system working well. If you want the best results and safety, do not wait to ask for help with custom solutions.
If you pick valves the right way, your system works better and stays safe. Make a simple checklist before you start. Think about what your job needs, how much flow you have, and what materials you use. Pick the best valve type and actuator for your job. Check each step to be sure it fits your process. Look over your choices often and take care of your valves to keep things working well. If your job is tricky, ask an expert for help. Picking the right valve helps your system work better and saves money.
FAQ
What is the most important factor when choosing a pneumatic control valve?
You need to pick a valve that fits your job. Always check what kind of fluid you have, how fast it moves, and the pressure and temperature. These things help you choose the right size, material, and type of valve.
How do I know if my valve material is compatible with my process fluid?
Look at the chemical resistance chart from the valve maker. Match your fluid and temperature to what the chart says is safe. If you see rust or leaks, you should use a different material.
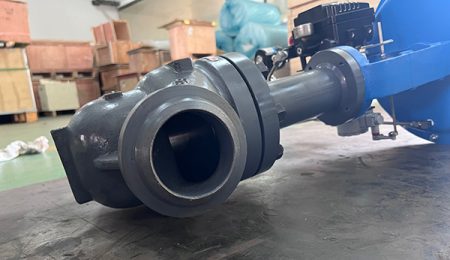
Can I use one valve for both shutoff and throttling?
Some valves, like globe valves, can stop flow and also adjust it well. Other valves, like butterfly valves, are better for just stopping flow or simple control. Always check if the valve is made for both jobs before you use it that way.
How often should I maintain my pneumatic control valves?
Check your valves every 6 to 12 months. Look for leaks, worn parts, or slow movement. Clean the air supply and change seals if needed. Doing this often helps stop big problems.
What should I do if my valve actuator is too slow?
Look for leaks or blockages in your air supply. Make sure the actuator is the right size for your valve. You can add a positioner to help it move faster. If it is still slow, ask your supplier for help.
Do I need a positioner for every pneumatic control valve?
You only need a positioner if you want very exact control or need to check the valve from far away. For simple on and off jobs, you might not need one. Positioners help make the valve more accurate and let you watch it from a distance.
How do I ensure my valve meets safety standards?
Buy valves that have ANSI, ISA, or ATEX safety marks. Check the paperwork to see if it has these marks. If you work in a dangerous place, use valves that are made to be extra safe.
