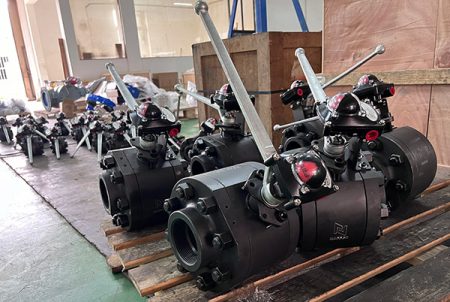
You can easily determine the status of a valve by observing the handle during the opening and closing valves process. For instance, a ball valve handle aligns with the pipe when open. A butterfly valve features a flat disc that aligns with the flow when open. When dealing with a pneumatic ball valve, look for specific marks or arrows indicating its position. Always double-check before you operate any valve.
?? Safety Tip: Always wear safety gear and inspect the area before you handle any valve.
Key Takeaways
- Look at the valve handle to see if it is open or closed. If the handle is parallel, the valve is open. If the handle is perpendicular, the valve is closed.
- Check for arrows, color codes, or labels on the valve. These markings help you know if the valve is open or closed. This keeps you safe.
- Rising stem valves show their position by the stem’s height. If the stem is up, the valve is open. If the stem is down, the valve is closed.
- Use mechanical, electrical, or remote feedback systems for hard-to-see valves. These systems help you know the valve’s position from far away.
- Turn valves clockwise to close them. Turn them counterclockwise to open them. Always check the labels because some valves are different.
- Open and close valves slowly and gently. Do not force a valve if it is stuck. This helps prevent damage.
- Always double-check the valve’s position before working on plumbing. Test the flow and look for leaks to be sure.
- If you are not sure about a valve’s position, ask a professional. This helps you avoid mistakes and keeps your home safe.
Visual Checks
If you want to know if a valve is open or closed, look at it first. You can find clues by looking at the valve. This helps you check quickly and safely.
Handle Position
The handle is easy to spot. Most valves have a handle that shows you the status right away.
Parallel to Pipe
When the handle matches the pipe, the valve is open. Water or gas can move through the pipe. Ball valves and butterfly valves use this way. You can trust this sign because plumbing rules say it works.
Perpendicular to Pipe
If the handle goes across the pipe, the valve is closed. This stops water or gas from moving. Always check for this before you work on the system.
?? Tip: Look at the handle from the side. Do not just look from above. This helps you see how it lines up.
Here is a table with common signs and what they mean:
| Visual Indicator | Description | Meaning / Valve Position |
|---|---|---|
| Handle Alignment | Handle direction compared to the pipe | Parallel = Open; Perpendicular = Closed |
| Engraved Arrows | Arrows show flow direction and alignment | Shows flow path and valve status |
| Color-Coded Handles | Handles are green or red | Green = Open; Red = Closed |
| Position Tabs or Flags | Tabs or flags on the handle | Shows valve status clearly |
| Transparent or Color-Coated Bodies | Valve lets you see the ball position | Lets you check open or closed |
Indicator Markings
Many valves have marks that help you know their position. These marks can be arrows, labels, or color codes.
Arrows and Labels
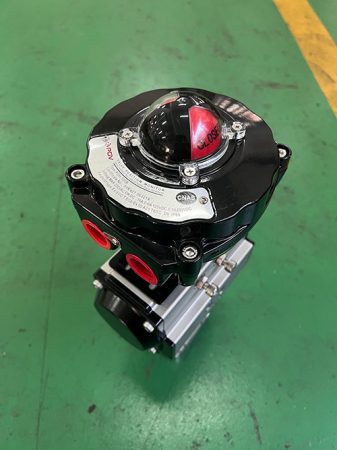
Look for arrows on the valve. Arrows show which way things flow. They help you match the handle to open or closed. Labels can show size, pressure, and who made the valve. You might see codes like “LF” for lead-free or “CWP” for cold working pressure.
- Common marks you may see:
- Valve size (inches or millimeters)
- Pressure class (PSI or PN rating)
- Manufacturer name and model number
- Lead-free mark (“LF”)
- Certification marks (UPC, ANSI, UL)
- Flow direction arrows
Color codes help too. Many valves use green for open and red for closed. This follows safety rules in plumbing and building.
? Note: Always read the labels and arrows before you turn a valve. This helps you avoid mistakes.
Stem Position
Some valves use a stem to show their position. The stem is a rod that moves when you turn the handle.
Rising Stem Valves
Rising stem valves make it easy to see if the valve is open or closed. If the stem sticks out, the valve is open. If the stem is down, the valve is closed. You can see this from far away.
| Feature | Rising Stem Valve | Non-Rising Stem Valve |
|---|---|---|
| Stem Movement | Stem goes up or down | Stem turns but does not move up or down |
| Position Indication | You can see if it is open or closed | No clear sign; you need to turn the wheel |
Rising stem valves give you a clear sign. Non-rising stem valves do not move up or down, so you need to check other signs or turn the wheel to feel when it stops.
??? Tip: If the stem moves up when you turn the handle, you are opening the valve. If the stem moves down, you are closing it.
Visual checks are quick and easy ways to know valve status. You do not need special tools or training. These ways work well at home or outside when you want fast answers. Always check again before you use any valve to keep your system safe.
Feedback Types
If you cannot see the valve, feedback systems help. These systems use mechanical, electrical, or remote ways to show position. You can use these tools for hard-to-reach valves. They also help when you need extra proof.
Mechanical Indicators
Mechanical indicators give a local sign of valve position. You often find these on big valves or actuators.
Position Windows
Position windows let you look inside the valve. You check through a clear window to see open or closed. Some windows use pictures or colors to make reading easy. You may see tough, sealed indicators like Indicateur VPT. These mount on big actuators and keep out dirt and water. Direct-mount indicators, like Indicateur Direct VPT, attach to stems and show position well.
??? Tip: Position windows work best in clean, dry places. In rough areas, dirt or water can block your view.
Color-Coded Indicators
Color-coded indicators use colors to show status. Green means open, and red means closed. Some indicators are built into limit switches or position indicators. These show the valve’s state quickly. You may also see tabs, flags, or arrows with colors for easy reading.
- Common mechanical indicators:
- Color tabs or flags
- Flow pictures on plates
- Sealed indicators for outdoor use
Mechanical indicators help you check valves fast. But they can fail in tough places. Dirt, rust, or water may cause mistakes or block the view. In places near the coast, mechanical indicators need extra checks to avoid errors.
Electrical Feedback
Electrical feedback uses sensors and switches to confirm position. You can trust these systems for safety and automation.
Limit Switches
Limit switches find valve position with a lever or contact. When the valve moves, the switch opens or closes a circuit. This sends a signal to panels or lights. Limit switches can be set as Normally Open or Normally Closed. These switches give digital feedback, showing if the valve is open or closed.
- How limit switches work:
- Lever moves with valve
- Contact opens or closes
- Signal sent to system or light
Indicator Lights
Indicator lights connect to limit switches or actuator ends. When the valve reaches a spot, the light turns on or off. Green lights mean open, and red lights mean closed. You see these lights on panels or near the valve. In automated systems, signals go to PLCs or alarms. This helps you act fast if something goes wrong.
Electrical feedback is strong and helps you avoid mistakes. It works well when you cannot see the valve.
Remote Monitoring
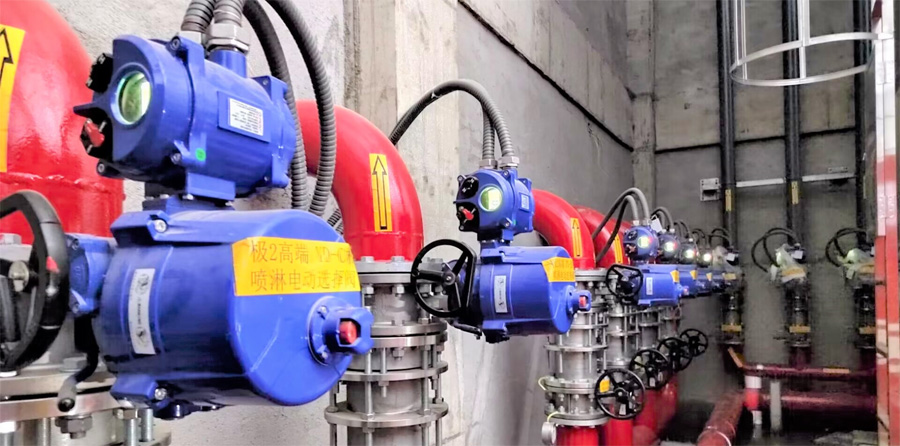
Remote monitoring lets you check valve position from far away. You can use smart home systems or control panels for this.
Smart Home Systems
Smart home systems use sensors and wireless signals. They show valve status on your phone or computer. You get updates and can close valves fast if there is a leak. Automated shutoff makes things safer and saves money. Smart valves use sensors and AI to adjust to changes, making your home safer and better.
Industrial Control Panels
Industrial control panels use sensors, transmitters, and software. They watch many valves at once. You see position, flow, pressure, and temperature in real time. Non-contact sensors and sealed electronics last longer and make fewer mistakes, even in rough places. Remote mounting lets you check valves in risky spots without going near them. These systems support many ways to talk to other devices, making setup easy.
?? Note: Remote monitoring cuts downtime and saves on repairs. You get early warnings about leaks or problems, so you can fix things before they get worse.
Feedback systems help you confirm valve position when you cannot look. You can pick mechanical, electrical, or remote ways based on your needs. Good feedback keeps your plumbing safe and helps you avoid big mistakes.
Valve Types
Valves come in many shapes and sizes. Each type has its own way to show if it is open or closed. Knowing the difference helps you check your plumbing quickly and safely. Here are some of the most common valves you will find at home.
Ball Valves
Ball valves are very popular in homes. You often see them under sinks or near water heaters. They use a round ball inside to control flow. You can spot a ball valve by its lever handle.
- How to check if it is open or closed:
- If the handle lines up with the pipe, the valve is open. Water or gas can flow through.
- If the handle sits across the pipe, the valve is closed. Nothing can pass through.
Ball valves work with a quick quarter-turn. This makes them easy to use. You do not need to guess. The handle tells you the valve’s position right away.
?? Tip: Ball valves often have color-coded handles. Green means open, and red means closed. Always double-check before you turn the handle.
Gate Valves
Gate valves are also common, but you may find them more often in older homes or main water lines. They use a round handwheel and a gate inside that moves up or down.
You can use both the handle and the stem to check the position. When you turn the handwheel counter-clockwise, the stem rises, and the valve opens. When you turn it clockwise, the stem lowers, and the valve closes.
| Valve Status | Handle Orientation | Stem Position | Handle Alignment Relative to Pipe |
|---|---|---|---|
| Open | Turned counter-clockwise | Stem is raised | Handle aligns with pipe direction |
| Closed | Turned clockwise | Stem is not raised | Handle is perpendicular to pipe |
- If the stem sticks out, the valve is open.
- If the stem is down, the valve is closed.
- You cannot turn the handwheel further when the valve is fully open or closed.
?? Note: Gate valves are not good for adjusting flow. Use them only for fully open or fully closed positions.
Butterfly Valves
Butterfly valves use a flat disc inside the pipe. You turn a lever or handle to move the disc. These valves are easy to spot because of their unique handle.
You can tell if a butterfly valve is open or closed by looking at the handle:
- If the handle is parallel to the pipe, the valve is open. Water or gas flows freely.
- If the handle is perpendicular to the pipe, the valve is closed. The disc blocks the flow.
Some butterfly valves have markings or position indicators on the handle or body. These help you see the valve’s status at a glance. In automated systems, you might see dials or electronic displays that show the position.
Butterfly valves work with a quarter-turn, just like ball valves. The handle’s position always matches the disc inside.
?? Tip: Always look for markings or arrows on the handle. These give you extra confidence before you operate the valve.
Globe Valves
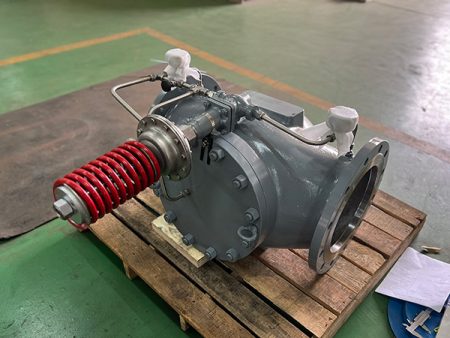
Globe valves control flow by moving a disc up and down inside the valve body. You often find these valves on outdoor faucets, hose bibs, and some heating systems. Globe valves work well when you need to adjust flow, not just turn it on or off.
You can spot a globe valve by its round body and handwheel. The handwheel sits on top and looks like a small steering wheel. The valve body usually has a bulge in the middle. This shape helps you tell it apart from other valves.
How to Check If a Globe Valve Is Open or Closed
You can use a few simple steps to check the position of a globe valve:
- Look at the Handwheel
Turn the handwheel counterclockwise to open the valve. Turn it clockwise to close it. The more you turn the handwheel, the more the valve opens or closes. Unlike ball or butterfly valves, globe valves do not use a quarter-turn. You need to spin the handwheel several times. - Check the Stem Position
Some globe valves have a visible stem. When you open the valve, the stem rises. When you close the valve, the stem lowers. If you see more of the stem sticking out, the valve is open. If the stem is down or flush with the handwheel, the valve is closed. - Feel for Resistance
When the valve is fully open or closed, you will feel the handwheel stop turning. Do not force it. Forcing can damage the valve.
?? Tip: Always turn the handwheel gently. If it feels stuck, stop and check for rust or debris.
Table: Globe Valve Position Guide
| Handwheel Direction | Stem Position | Valve Status |
|---|---|---|
| Counterclockwise | Stem rises | Open |
| Clockwise | Stem lowers | Closed |
Common Signs of Globe Valve Position
- Open: Handwheel turned left (counterclockwise), stem up, water or gas flows.
- Closed: Handwheel turned right (clockwise), stem down, flow stops.
Some globe valves do not have a rising stem. In these cases, you must rely on how far you have turned the handwheel. If you cannot see the stem, count the turns. Most globe valves need about three to five full turns from fully closed to fully open.
?? Safety Note: Always double-check before you work on pipes or fixtures. If you are not sure, ask a professional for help.
Globe valves give you good control over flow. You can use them to adjust pressure or slow down water. Always check the handwheel and stem before you start any plumbing job. This helps you avoid leaks and keeps your system safe.
Opening and Closing Valves
It is important to know how to use valves safely. This helps you stop leaks and keep your plumbing safe. You need to learn the right way to open and close different valves. This part will show you the basics. You will learn which way to turn and how to use each handle.
Turning Direction
Most valves use an easy rule for turning. You turn the handle to the right to close it. You turn the handle to the left to open it. This works for most valves at home. If you remember this, you can use most valves without worry.
Clockwise to Close
To stop water or gas, turn the handle to the right. This is called turning clockwise. The handle will feel tighter as you close the valve. If the handle stops, do not push harder. Forcing it can break the handle or damage the valve.
Counterclockwise to Open
To let water or gas move, turn the handle to the left. This is called turning counterclockwise. The handle will feel looser as you open the valve. Some valves, like globe or gate valves, need many turns. Ball and butterfly valves only need a quarter-turn.
Here is a table to help you remember how to turn each valve:
| Valve Type | Opening Direction | Closing Direction |
|---|---|---|
| Globe Valve | Turn handle fully counterclockwise | Turn handle fully clockwise |
| Ball Valve | Lever parallel to pipe | Lever perpendicular to pipe |
| Gate Valve | Handle/wheel aligned straight | Handle/wheel turned 90° perpendicular |
| Butterfly Valve | Lever parallel to pipeline | Lever perpendicular to pipeline |
?? Tip: If you do not know which way to turn, look for arrows or labels. Many valves have marks to show the right way.
Lever and Knob Styles
Valves have different handles. You might see levers, knobs, or ball-cock handles. Each one works a bit differently. But the main rules for opening and closing are the same.
Lever-Operated Valves
Lever-operated valves, like ball and butterfly valves, have a straight handle. You only need to turn the handle a quarter of the way. When the lever matches the pipe, the valve is open. When the lever goes across the pipe, the valve is closed. This makes it quick and easy to use.
- How to use:
- Hold the lever tight.
- Turn it 90 degrees the right way.
- Check the handle to see if the valve is open or closed.
Knob or Ball-Cock Valves
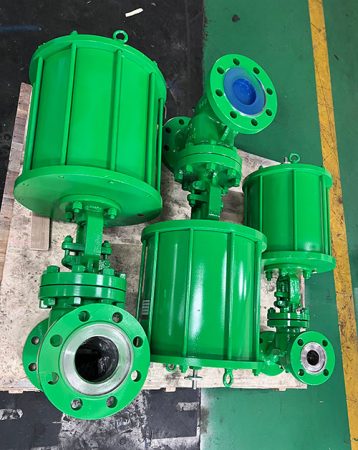
Knob or ball-cock valves have a round handle or wheel. You often see these on old pipes or toilet shutoffs. You need to turn the knob many times to open or close it. Remember, right closes and left opens.
- How to use:
- Grab the knob or wheel.
- Turn it slowly the right way.
- Stop when you feel it cannot turn anymore.
?? Safety Reminder: Always check the valve before you start any plumbing job. Wear gloves if the handle is stuck or hard to move.
Opening and closing valves the right way keeps your house safe. Take your time, follow the turning rules, and check the handle before you use any valve.
Avoiding Mistakes
Mistakes can happen when you check or use valves. You can avoid most problems by following a few simple steps and paying close attention to details. Learning from common errors helps you keep your plumbing safe and working well.
Double-Check Steps
You should always double-check before you decide a valve is open or closed. Many people make mistakes by rushing or skipping important steps. Here are some ways to make sure you get it right:
- Look at the Handle and Stem
Check the handle’s position and, if possible, the stem. Make sure the handle lines up with the pipe for open, or sits across for closed. For rising stem valves, see if the stem is up or down. - Test for Flow
After you close a valve, turn on a nearby faucet or appliance. If water or gas still flows, the valve may not be fully closed. Never assume a valve is shut just because you turned the handle. - Inspect for Leaks or Damage
Look for drips, corrosion, or worn parts around the valve. These signs mean the valve might not work as it should. - Operate the Valve Gently
Never force a stuck valve. Forcing can break the handle or cause leaks. If a valve feels hard to turn, stop and check for rust or debris. - Exercise Valves Regularly
Open and close each valve at least once a year. This keeps them from freezing in place and helps you spot problems early.
?? Tip: Always wear gloves and eye protection when working with valves, especially if you suspect leaks or pressure.
Common Mistakes to Avoid:
- Misreading the handle position, especially on gate valves.
- Forgetting to check if water flow has stopped after closing a valve.
- Using too much force on stuck valves.
- Not knowing where the main shut-off valve is located.
- Ignoring leaks, rust, or signs of wear.
- Failing to drain water from pipes after shutting off a valve.
Manuals and Labels
Manuals and labels give you important information about your valves. You should always read them before making changes or repairs.
- Check for Labels:
Many valves have arrows, color codes, or tags that show open and closed positions. Green often means open, and red means closed. Some valves have flow direction arrows or pressure ratings. - Read the Manual:
The manufacturer’s manual explains how to use and maintain the valve. It tells you the right way to open or close it, how many turns are needed, and what to do if you have problems. - Label Your Valves:
If your valves are not labeled, add your own tags. Use waterproof labels or colored tape to mark the main shut-off, outdoor valves, or special-purpose valves. This helps you and others find the right valve fast in an emergency.
| What to Check | Why It Matters |
|---|---|
| Labels and Arrows | Prevents confusion and mistakes |
| Manufacturer’s Manual | Gives correct operation instructions |
| Your Own Tags | Speeds up emergency response |
?? Note: If you cannot find a manual or label, ask a professional plumber for help. Never guess when it comes to your home’s safety.
By double-checking your work and using manuals and labels, you can avoid most valve mistakes. These habits protect your home and give you peace of mind.
If Unsure
Ask a Professional
Sometimes, you may not feel sure about a valve’s position. You might see a handle that does not match the usual signs. You may find a valve in a hard-to-reach spot or see markings that look confusing. In these cases, you should ask a professional for help. Plumbers and utility experts have the right tools and training. They can check the valve safely and fix any problems.
You can also use resources made for homeowners. Many groups offer guides and videos to help you learn about valves. For example:
- NC811 offers hands-on learning with the Safe Digging Express trailer. You can see how to work with valves and pipes in a safe way.
- You can watch videos and download guides that explain how to find and use shutoff valves.
- Pipes Plus Training and other programs teach you how to prevent damage and stay safe around plumbing.
- SERVPRO explains where to find main water shutoff valves. You can look in basements, crawlspaces, mechanical rooms, or on exterior walls. These tips help you act fast in an emergency.
You do not need to solve every problem alone. If you feel unsure, call a plumber or your local utility company. They can answer your questions and keep your home safe.
?? Tip: Never guess about a valve’s position if you are not sure. A wrong move can cause leaks or damage.
Safety Precautions
You should always put safety first when working with valves. Even if you feel confident, take a few extra steps to protect yourself and your home.
Basic Safety Steps:
- Wear Safety Gear
Use gloves and eye protection. This keeps you safe from sharp edges, hot water, or chemicals. - Check for Leaks
Look for water, gas, or rust around the valve. If you see a leak, stop and call a professional. - Know the Main Shutoff Location
Find your main water shutoff valve before you need it. SERVPRO suggests checking basements, crawlspaces, or near the water meter. Mark the spot with a tag or label. - Read Labels and Manuals
Always read any labels or instructions on the valve. Manuals give you the right steps for opening or closing each type. - Keep Tools Ready
Have a wrench or pliers nearby. Some valves need a tool to turn them. - Do Not Force a Valve
If a valve feels stuck, do not use extra force. Forcing can break the valve or cause a leak. - Call for Help if Needed
If you cannot tell if a valve is open or closed, or if you see damage, call a professional right away.
? Note: Many training programs and guides are free for homeowners. You can learn safe practices before you ever touch a valve.
You can keep your home safe by following these steps. When in doubt, always ask for help. Safety matters more than speed.
Why Valve Position Matters
Preventing Leaks
You can stop leaks by checking your valve positions. If you leave a valve open or closed at the wrong time, water or gas can escape. This can make puddles or stains in your house. Sometimes, a valve that does not seal well will drip slowly. Over time, small leaks waste water and cost you more money.
- Wrong valve positions can cause:
- Pressure problems in your pipes
- Leaks that hurt walls, floors, or ceilings
- Pipes bursting, especially with high pressure
- Environmental risks from water or gas escaping
?? Tip: Always check your valves after repairs or changes. A quick look can save you from a big mess later.
Protecting Plumbing
Your plumbing works best when every valve is in the right spot. If you leave a valve wrong, water or gas flow gets messed up. This makes your system work harder and less well. For example, if a valve blocks water in a heater, some rooms may not get warm. Pipes can burst if pressure builds up behind a closed valve.
- Problems from wrong valve positions include:
- Heating or cooling systems work less well
- Uneven temperature in your house
- Damage to pipes, pumps, or other equipment
- More energy use and higher bills
Repairs are harder when valves are not set right. Plumbers may have trouble finding the problem. This can make fixes take longer and cost more. If you see a valve installed backward or leaking, fix it right away to stop bigger problems.
Home Safety
Valve position helps keep your home safe. When you use valves the right way, you protect your family and house from danger. Pressure reducing valves (PRVs) keep water pressure safe. This stops pipes and fixtures from breaking, especially if water pressure is high.
- Using valves the right way helps you:
- Stop leaks and water damage
- Avoid dangerous pressure build-up
- Lower the risk of fires or gas leaks
- Keep plumbing problems from becoming emergencies
?? Note: Check your valves often and plan for maintenance. Trained professionals can find problems early and keep your system safe.
You can make your home safer by learning how to use valves and teaching others. When everyone knows what to do, accidents are less likely. Automated valves and remote monitoring help you spot trouble before it gets worse.
You can find out if a valve is open or closed by looking at the handle, stem, and markings. Always check twice before you open or close a valve. Test for leaks or if the valve is hard to turn. Make sure you know where your main shut-off valves are. Keep them working well. If you do not feel sure, ask an expert for help. Checking valves often and using safe steps helps you feel ready to fix plumbing at home.
??? Be safe and keep your plumbing working well by following these easy tips.
FAQ
How do I know if my main water valve is open or closed?
Look at the handle. If it lines up with the pipe, the valve is open. If it sits across the pipe, the valve is closed. You can also check for water flow at a faucet.
Can I use WD-40 if my valve is stuck?
You can use a small amount of WD-40 on the valve stem. Let it sit for a few minutes. Try turning the handle gently. If it still will not move, call a plumber.
What should I do if a valve leaks after closing it?
Tighten the packing nut slightly with a wrench. If the leak continues, replace the washer or call a professional. Do not ignore leaks. Water damage can get worse quickly.
Are all valve handles color-coded?
No, not all valves use color codes. Some have plain metal handles. Always check for arrows, labels, or the handle’s position to know if the valve is open or closed.
How often should I check my home’s valves?
Check your valves at least once a year. Turn each valve to make sure it moves easily. Look for leaks, rust, or damage. Regular checks help prevent problems.
Is it safe to turn a valve with pliers?
Use pliers only if the handle will not turn by hand. Grip gently to avoid breaking the handle. If the valve feels stuck, stop and call a plumber for help.
What does a rising stem on a valve mean?
A rising stem shows you the valve’s position. When the stem sticks out, the valve is open. When the stem is down, the valve is closed. This makes it easy to check from a distance.
Can I label my own valves at home?
Yes, you can add labels or colored tape to your valves. Mark the main shut-off and other important valves. Labels help you and others find the right valve fast in an emergency.
